


Jackpot Jersey- Knitting Pattern
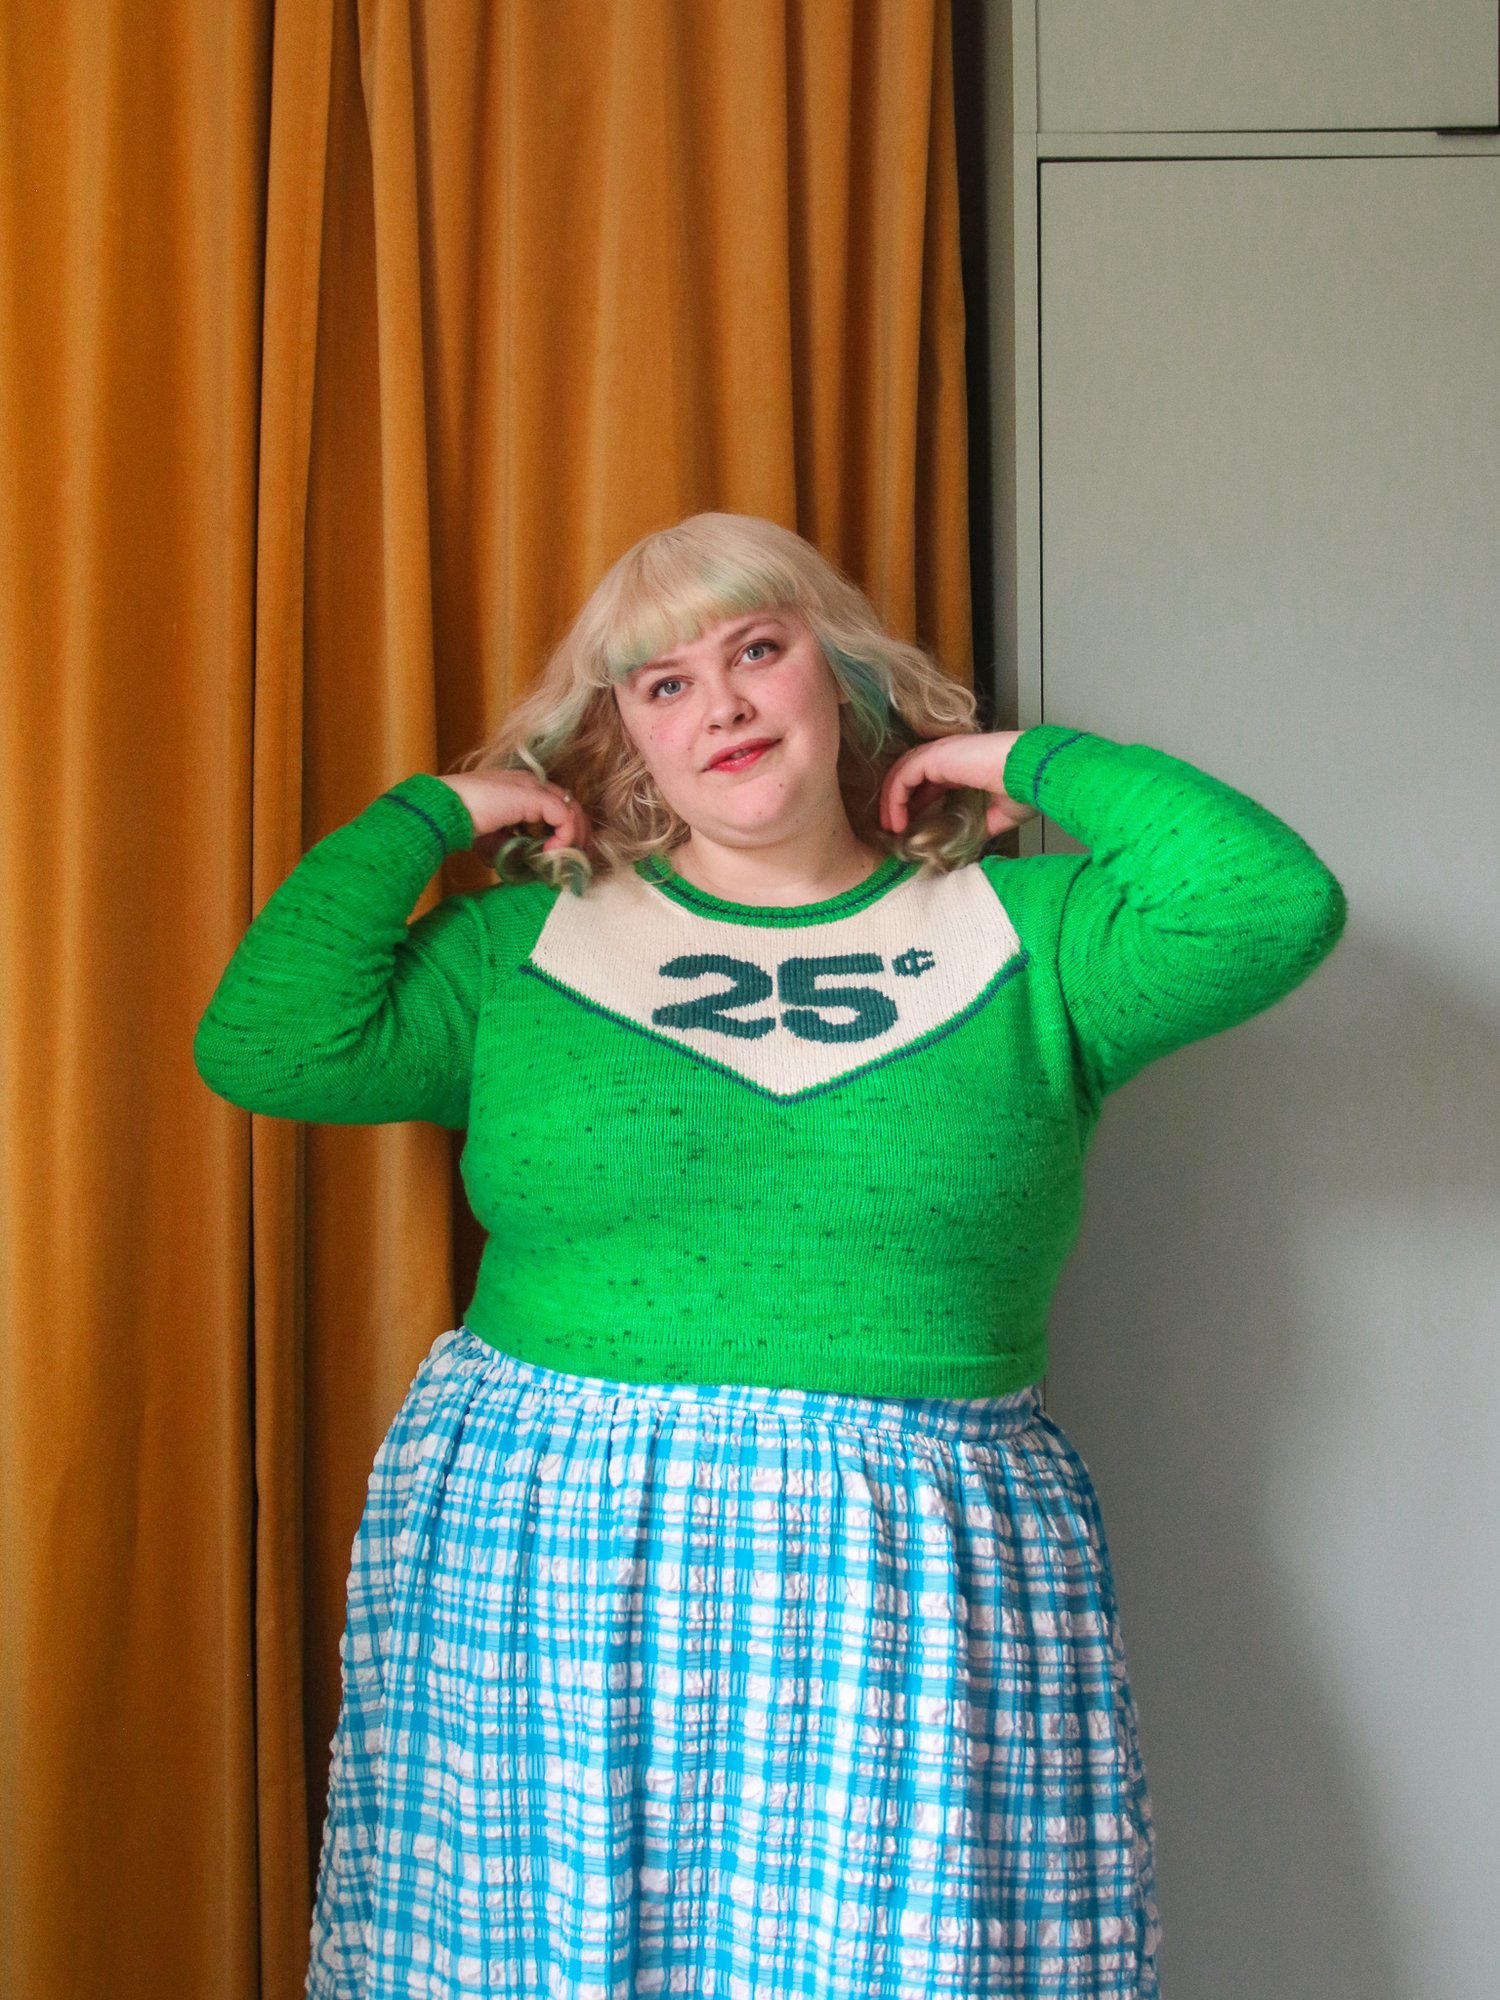
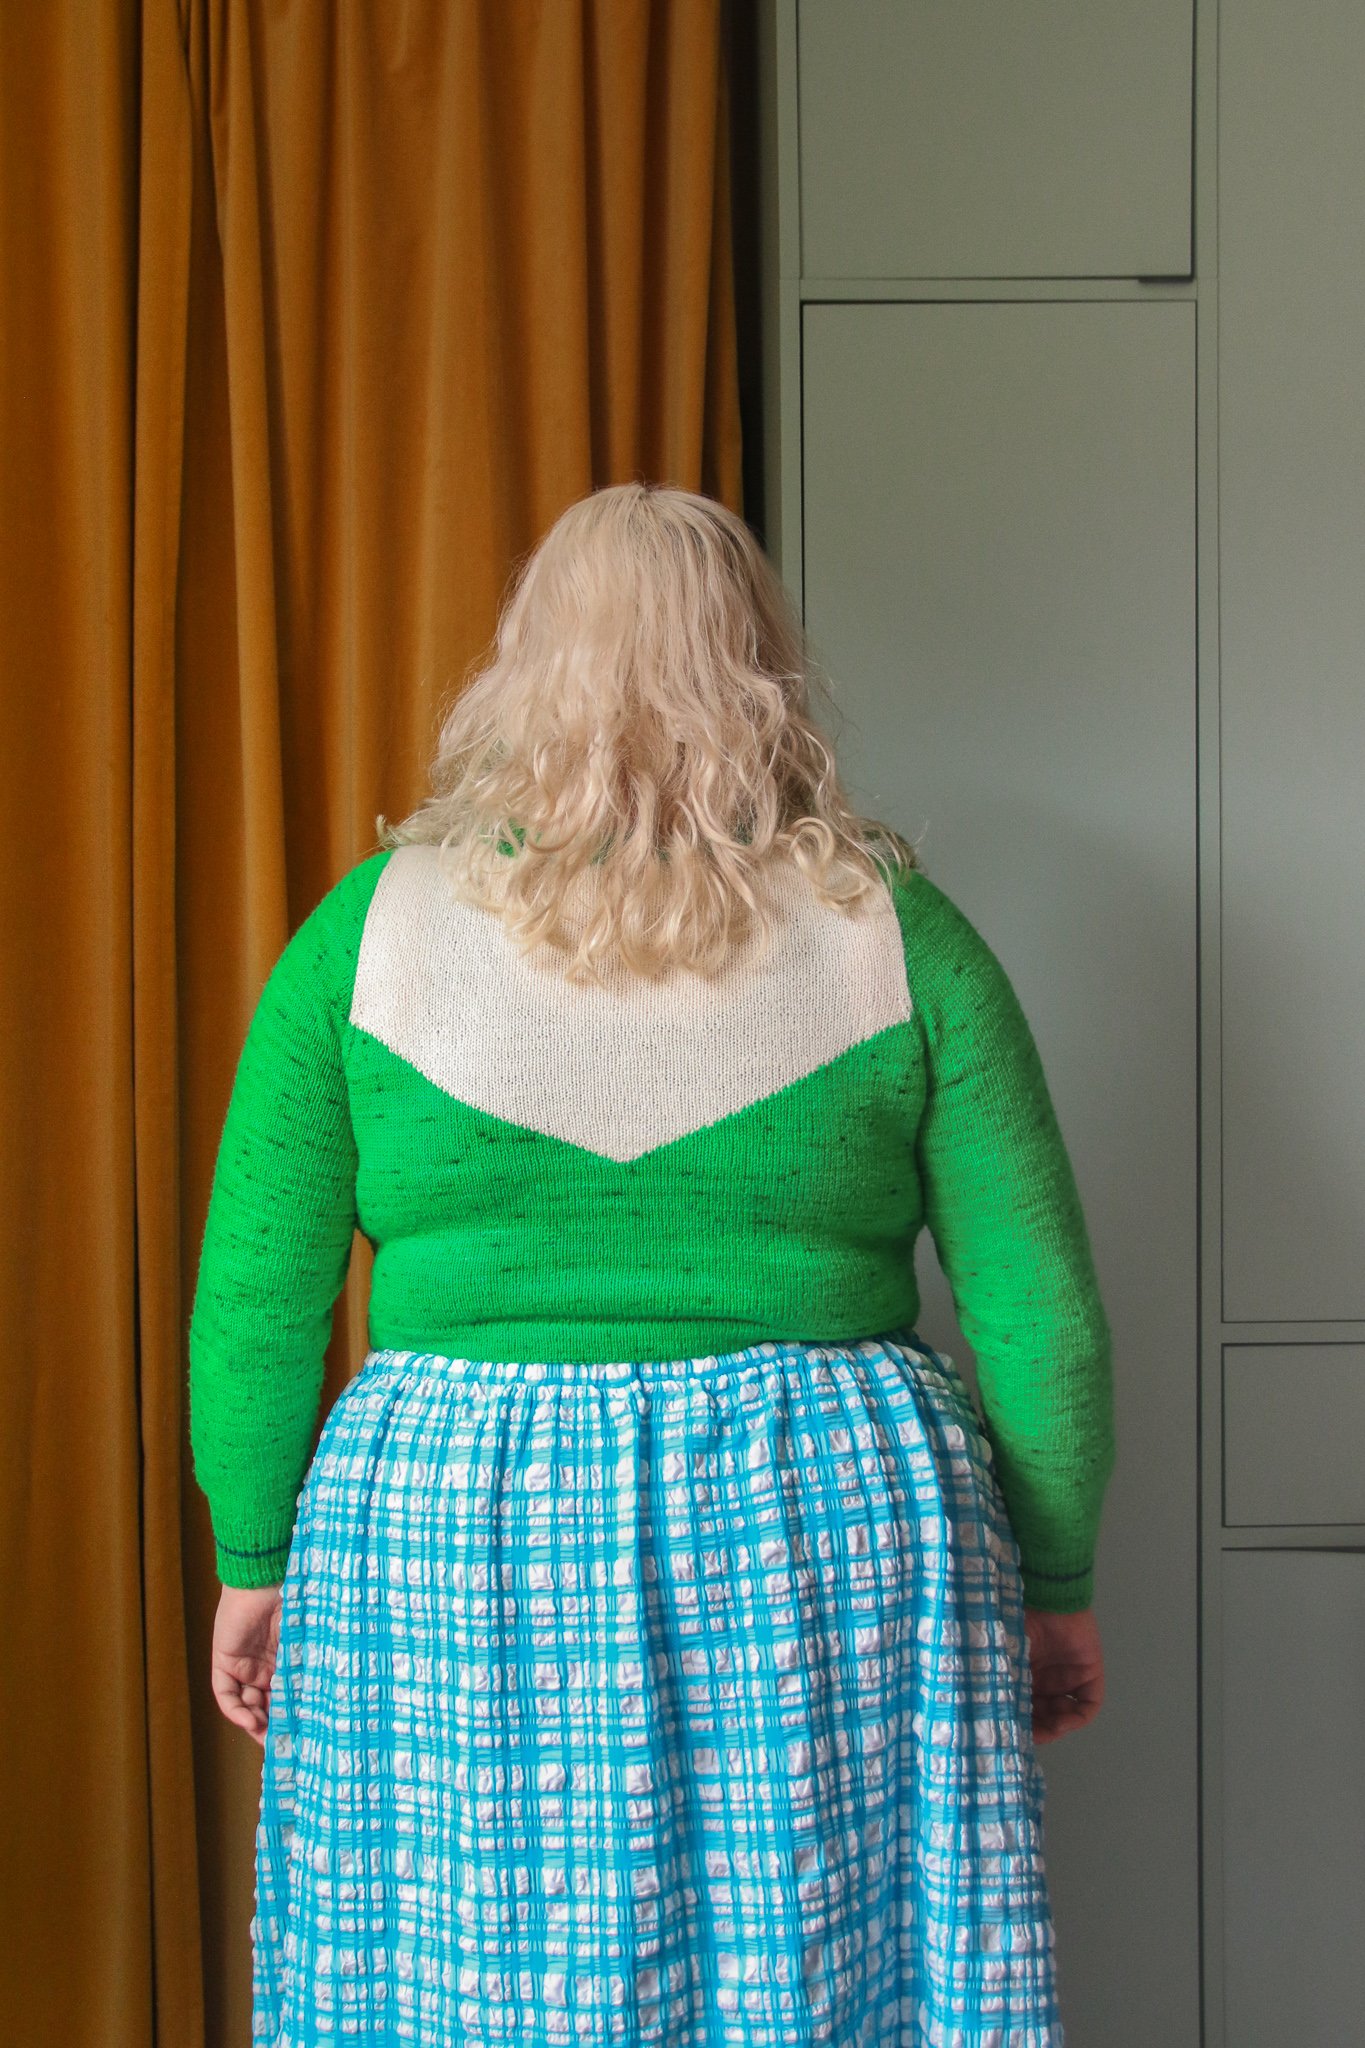
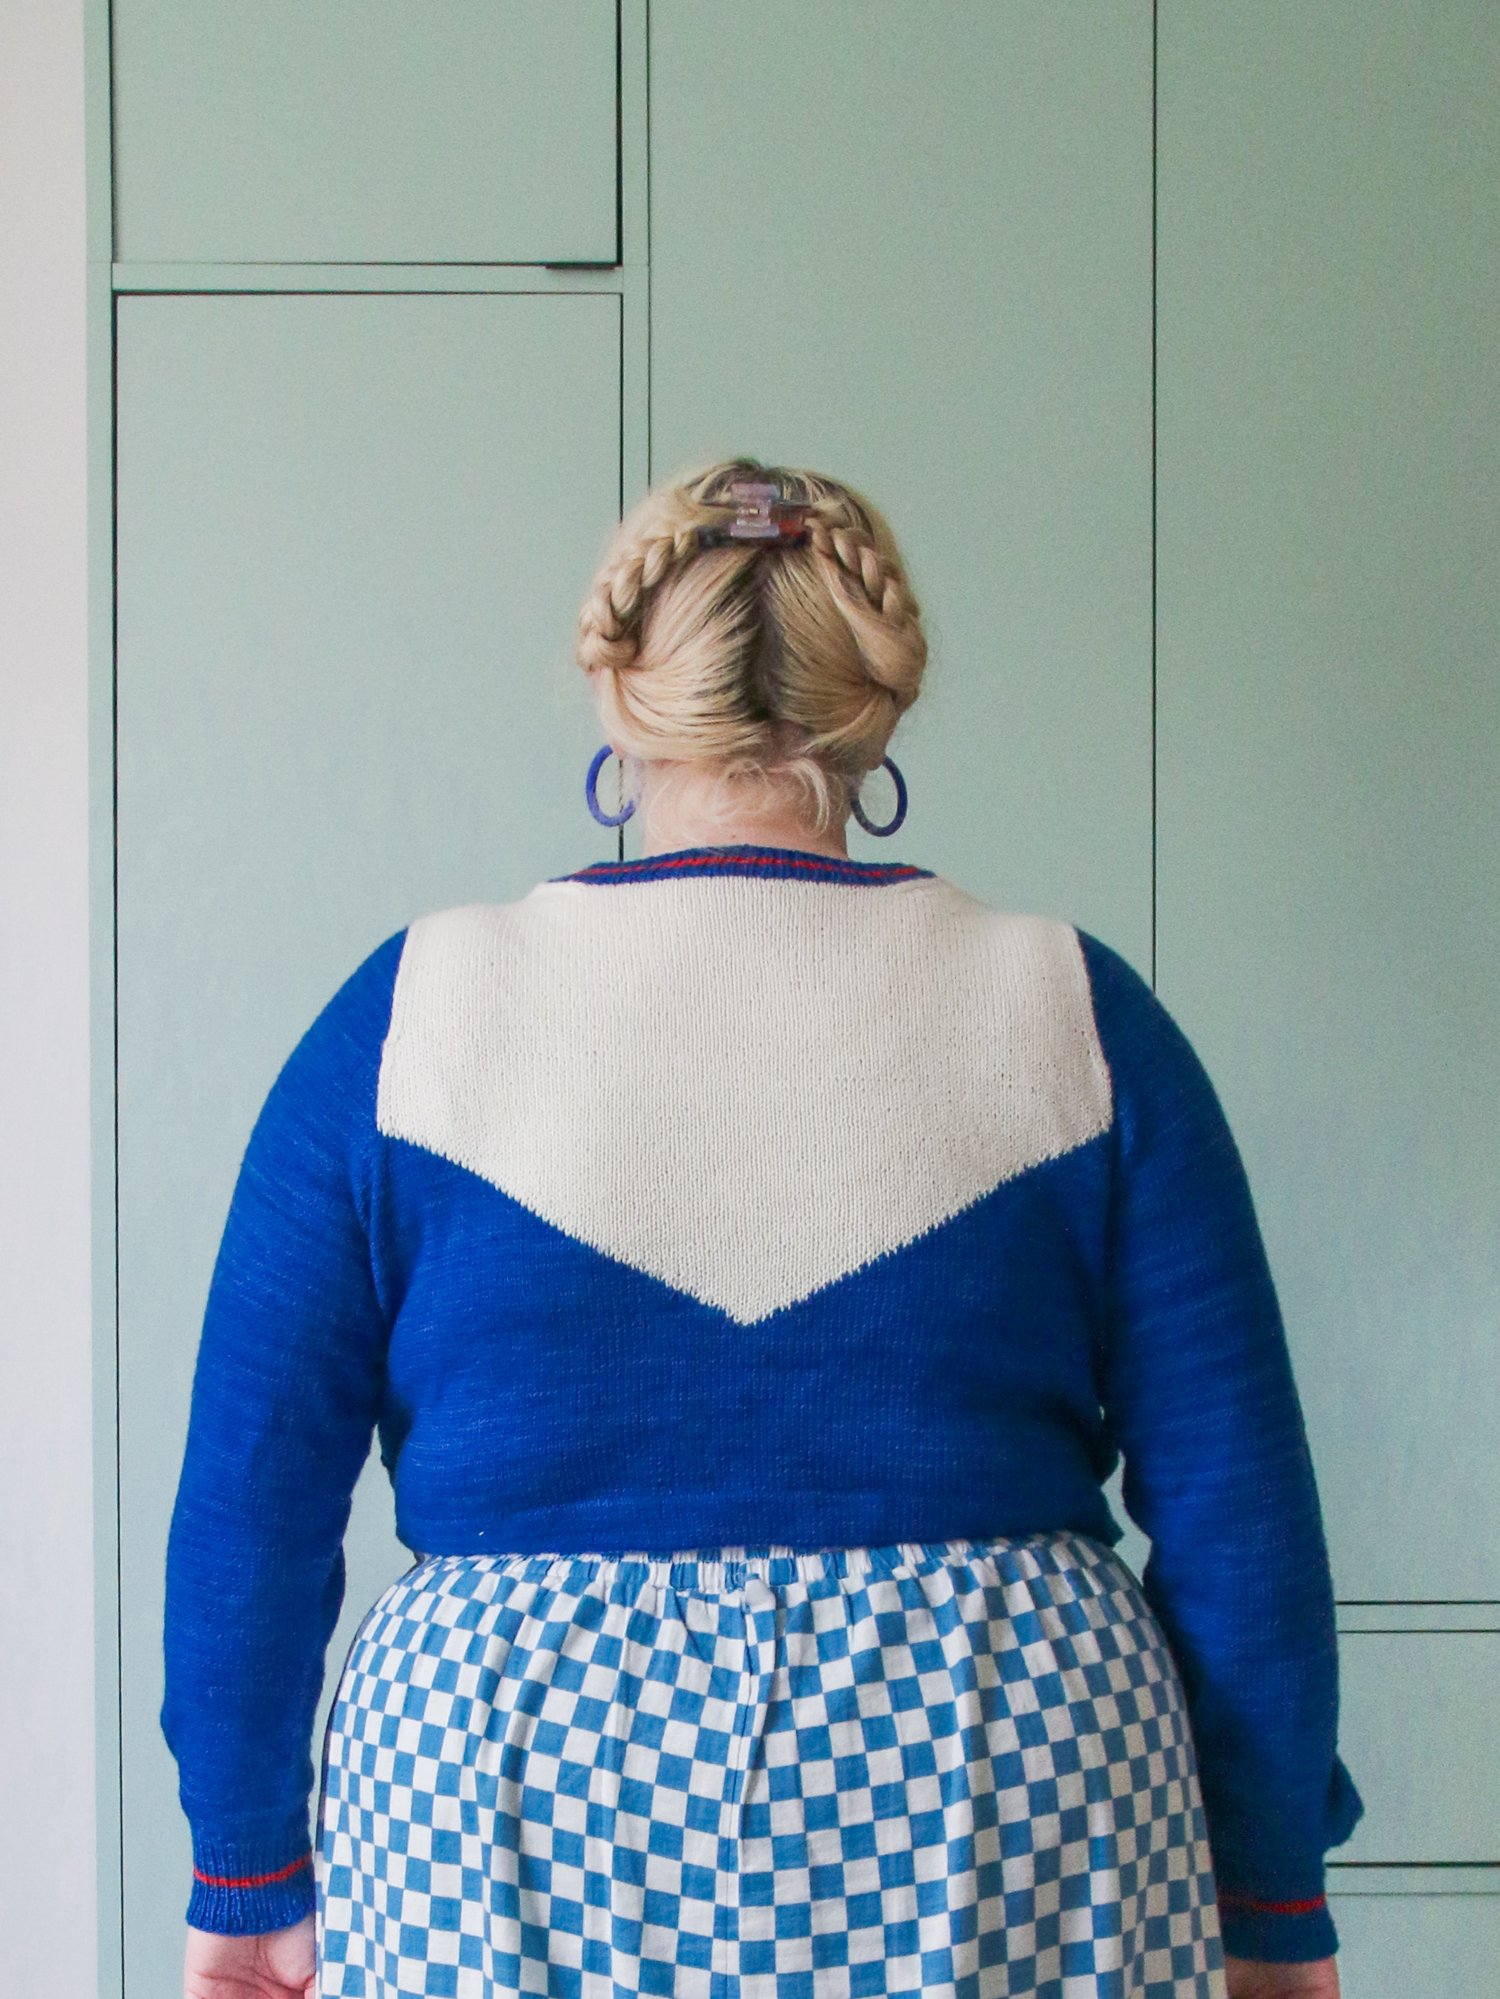
The Jackpot Jersey is designed to look like a classic, American cheerleader jersey- but this time it’s for everyone! The vintage aesthetic and sporty vibe are offset by the maximal comfort. With a comfy, negative ease cropped fit in the body, with waist shaping and gradually more ease through the long sleeves as well as 5 bust shaping options, it’s stylish, extremely well fitted, and super easy to move around in. The front and back are worked flat separately using intarsia knitting, joined at the shoulders with a 3-needle cast-off, and sewn together at the sides. Stitches are picked up for the sleeves, which are worked seamlessly in the round to the cuff. Finally, stitches are picked up and knit for the stand-up collar. This pattern will also give instructions for how to embroider your own design or team branding for the perfect final touch!
It is important to me that this pattern is financially accessible and so for low-income customers, this pattern can be purchased at 33% off using the code ‘LOW33’ and at 50% off using the code ‘LOW50’. This is an honours system - please respect that I also am trying to make a living from my designs and if you can afford the full price I’d appreciate if you paid it.
At the chest, there are optional short rows which can be added to accommodate breasts. This pattern is graded using ‘women’s’ sizing charts and is designed with a wide variety of body shapes in mind. This style is totally unisex and should also fit a lot of cis men and other people who usually use ‘men’s’ sizing charts, but be aware if you have particularly broad shoulders this may not be the pattern for you- please check the final measurements in the schematic.
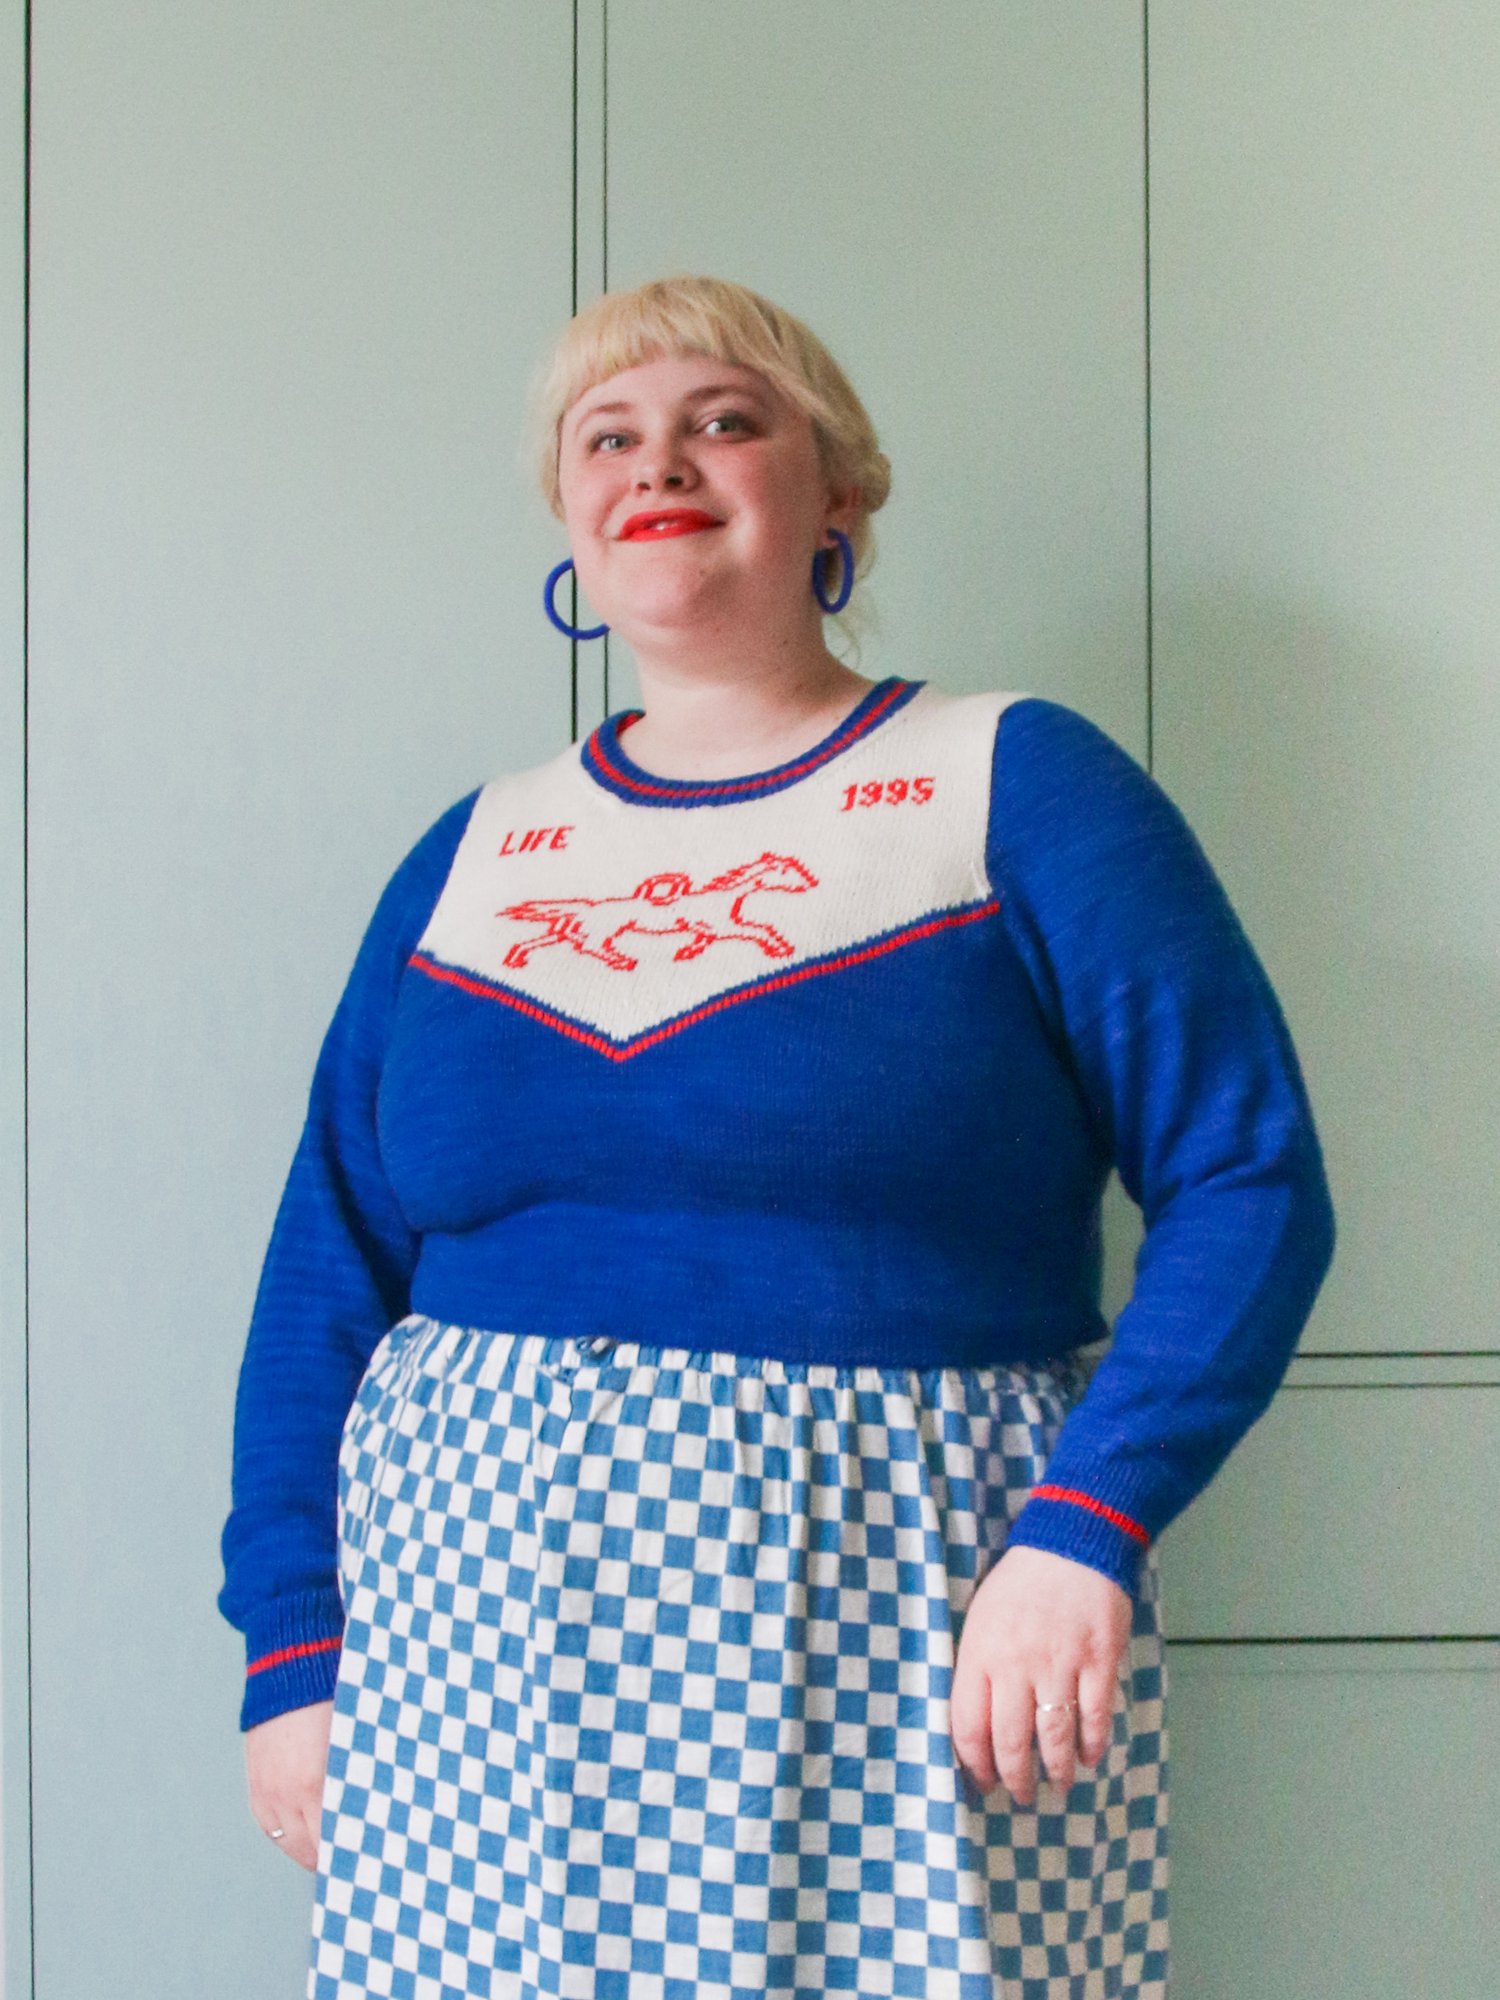
The body of the pattern is made with 2 main colours joined with an intarsia V shape. For a super nice, true-vintage aesthetic, the ribbing is worked in stripes using an additional contrast colour, the same colour that is used for the duplicate embroidery design. You are welcome to change to intarsia wherever you would like, but instructions are given for your ‘V’ to be proportionally fit to your body - worked upwards from the bust apex. The duplicate stitching charts included are scaled at a few different sizes to allow for flexible design choices no matter what size you are knitting.
Choosing a Size:
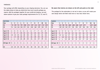
Choose the size that most closely matches your upper chest/bust measurement: Sizes 1 2, 3, 4, 7) 8, 9, 10 11 will fit upper chest measurements of 67.5 77.5, 85.75, 93.7510, 118.25) 126.25, 134.5, 142.5 147.5cm / 27 31, 34.25, 37.54, 47.25) 50.5, 53.75, 57 59in.
This is a negative ease garment. If you choose a size larger than indicated, the garment may not fit the way you expect.
To measure your upper chest/bust measurement, place a tape measure around your body underneath your armpits at an angle and keeping arms relaxed at your sides.
Finished bust: 57.25 65.75, 74.25, 82.7500, 108.5) 117.25, 125.75, 134.25 142.75cm / 22.75 26.25, 29.75, 33.250, 43.5) 46.75, 50.25, 53.75 57.25in, intended negative ease of 10.25 11.75, 13.25, 14.757.5, 19) 20.25, 21.75, 23.25 24.75cm / 4.25 4.75, 5.25, 5.75, 7.5) 8.25, 8.75, 9.25 9.75in.
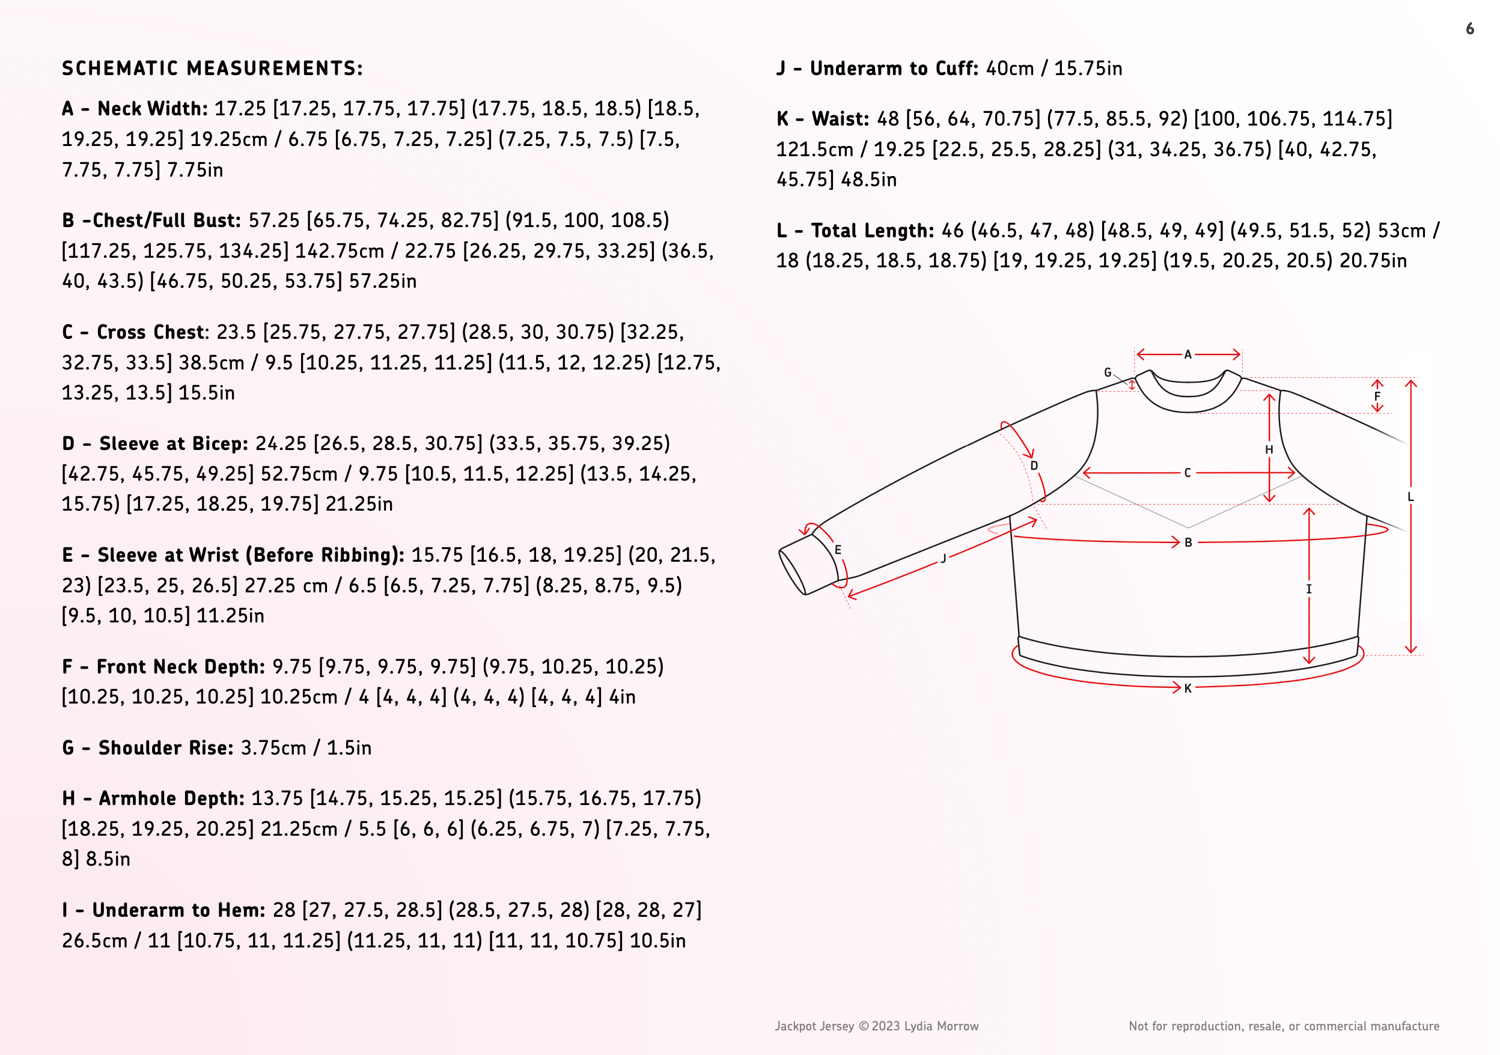
Schematic illustration with complete measurements appears in pattern description.
Choosing Shaping:
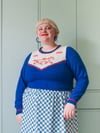
If you have breasts, and often feel the front of your garments are shorter than the back, there is the option to work short row shaping over your chest to add length at the front only. This shaping is available in 5 cup sizes, adding 3 (6, 9, 12) 15cm / 1.25 (2.5, 3.5, 4.75) 6in.
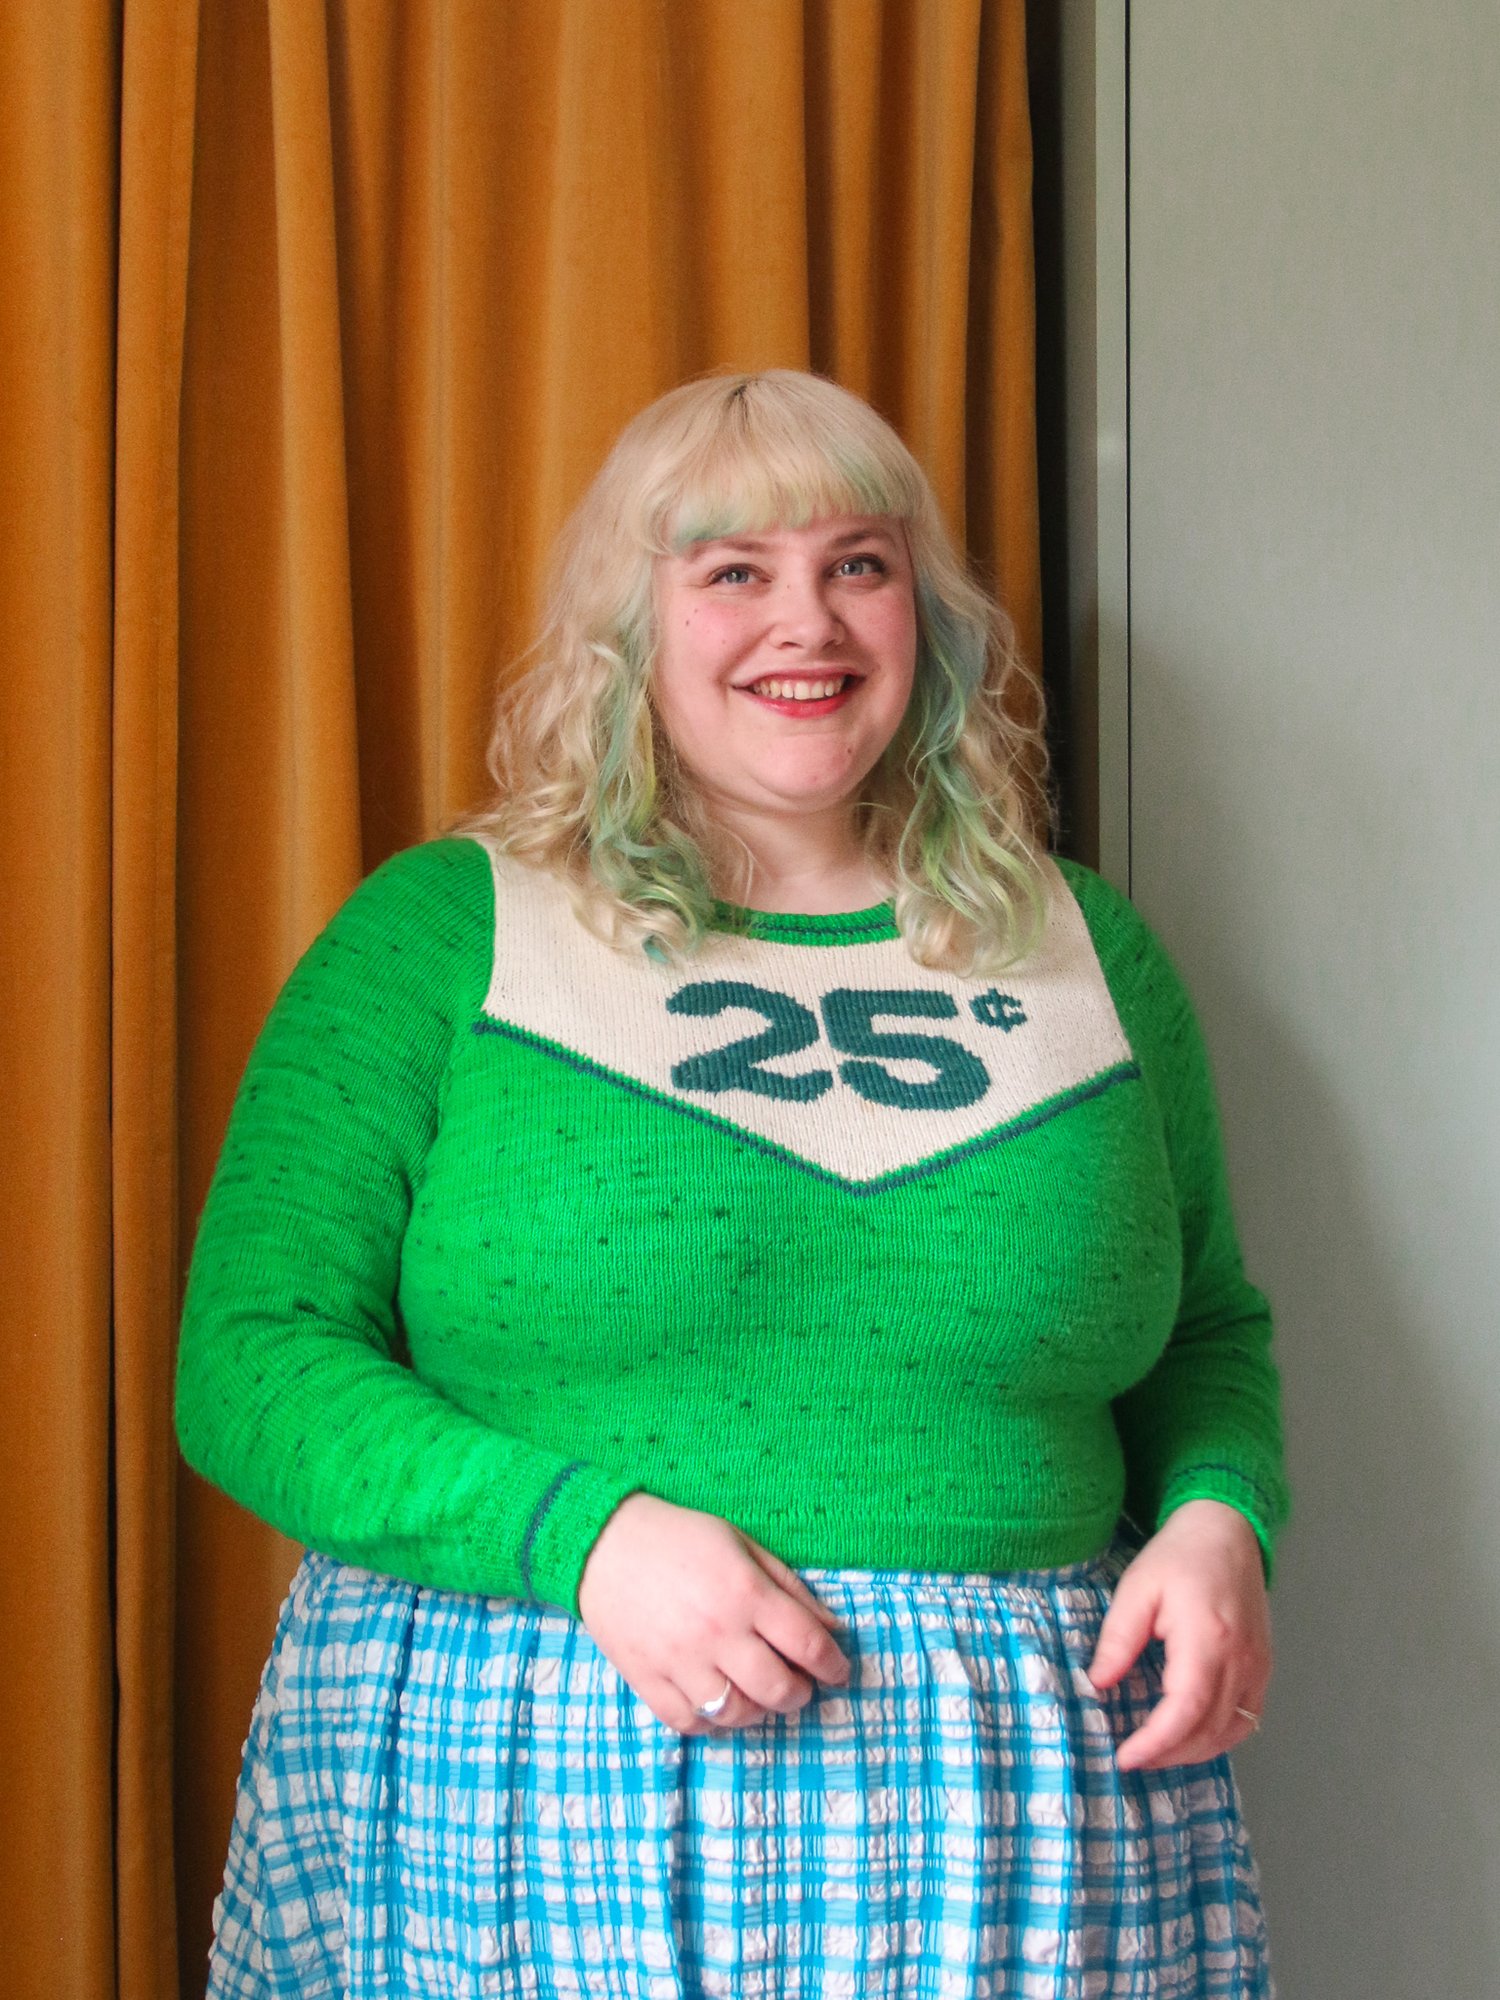
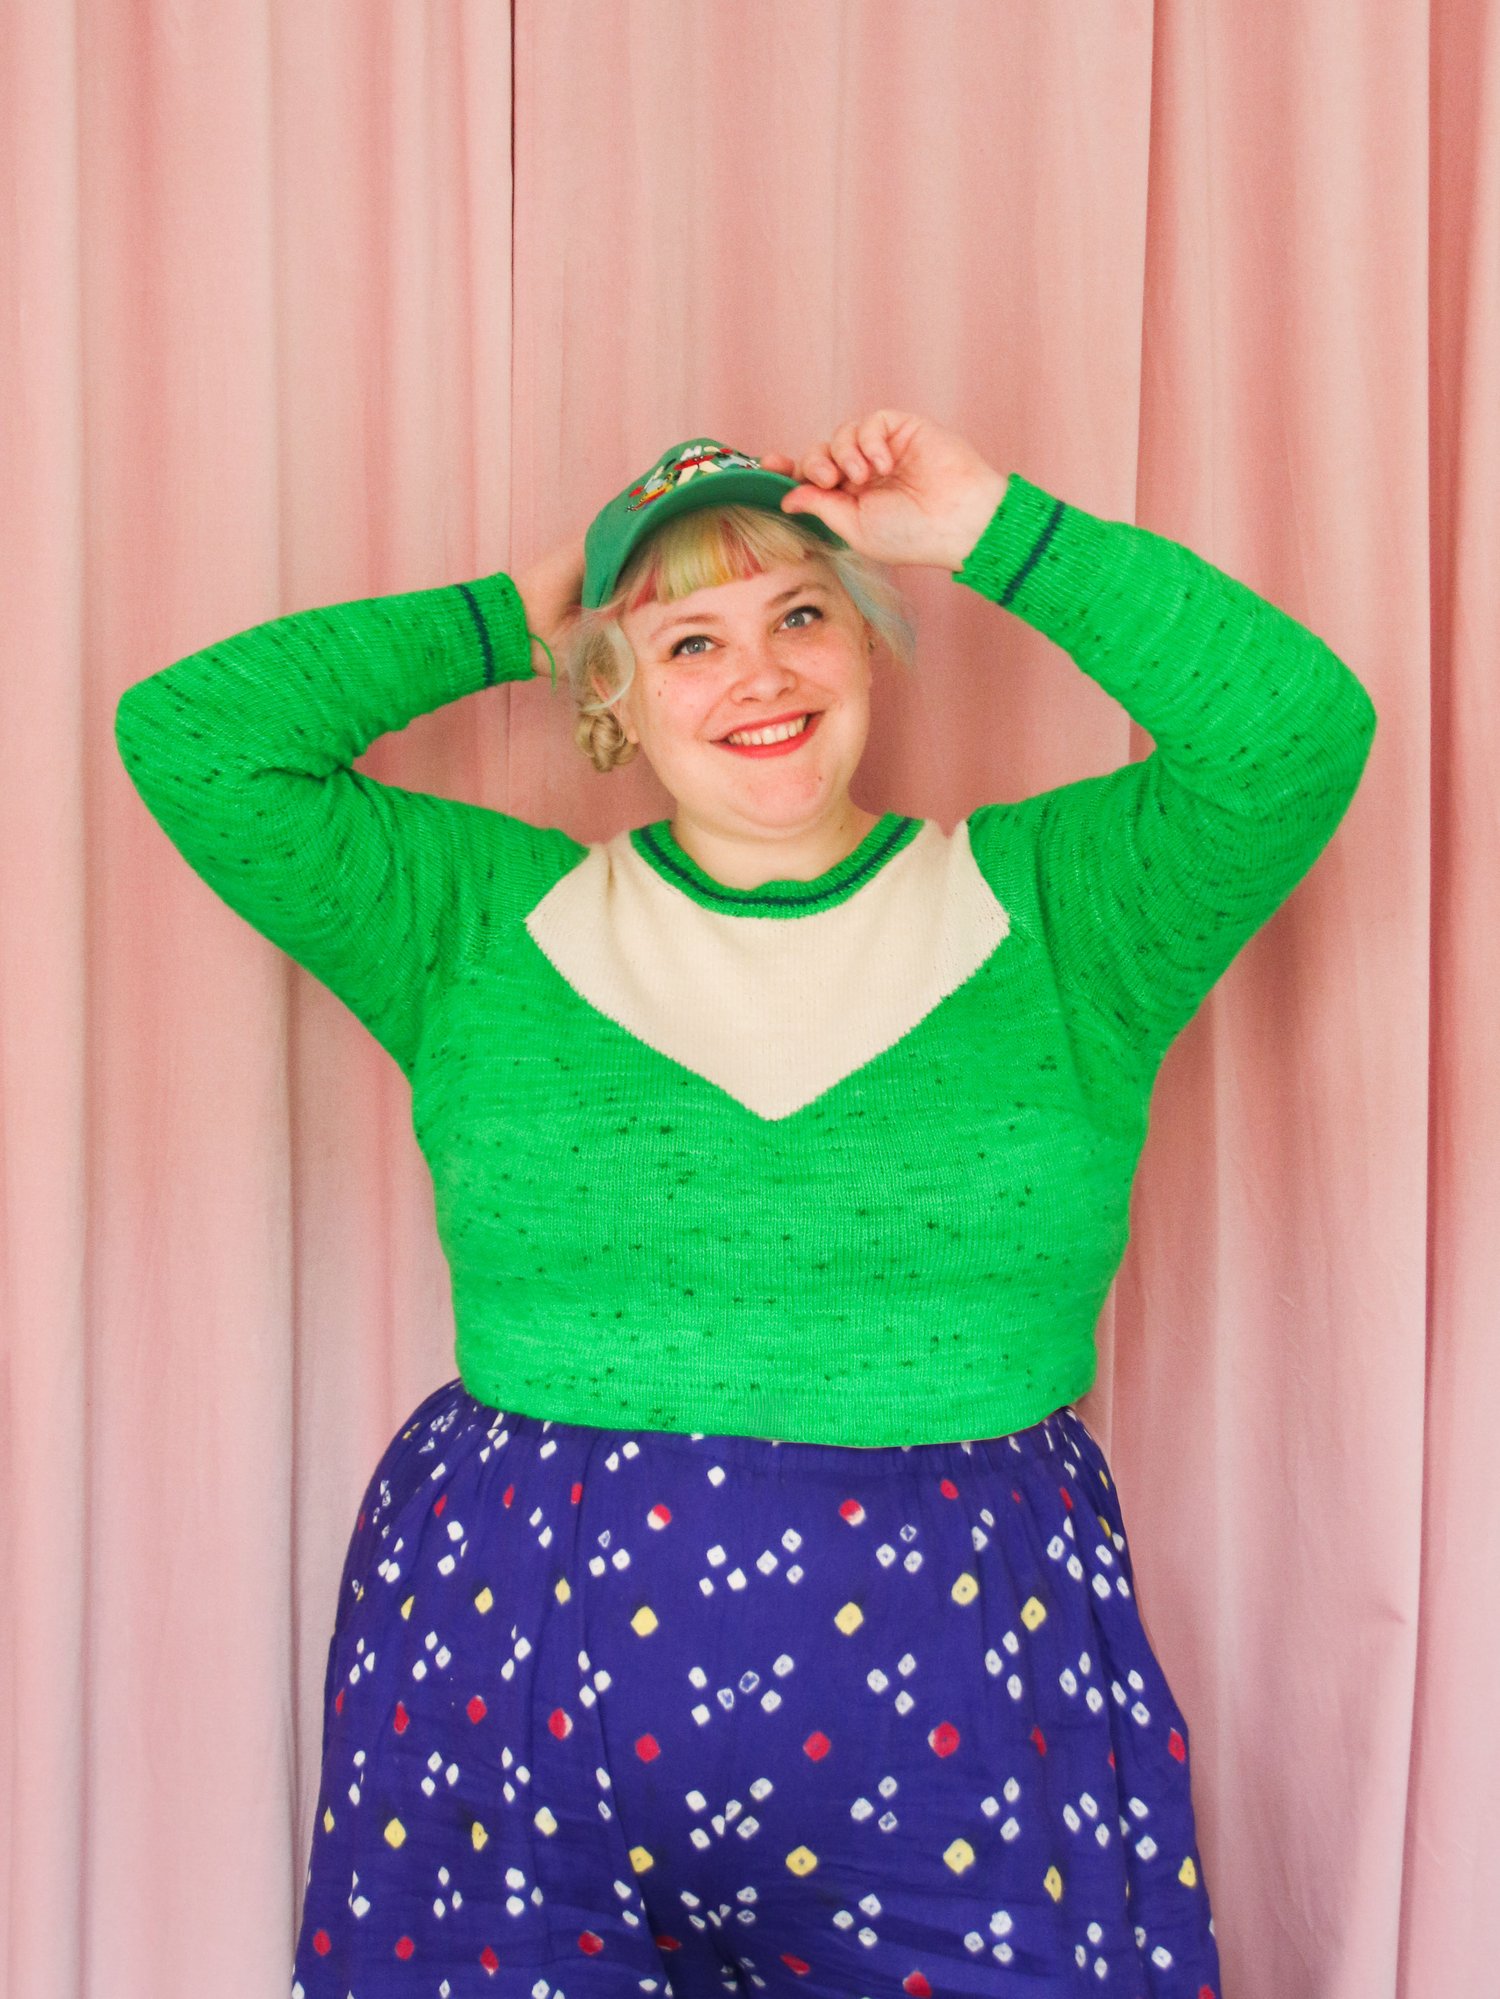
Size 7 with Cup size 2 in green is shown on on a model with an upper chest measurement of 48in.
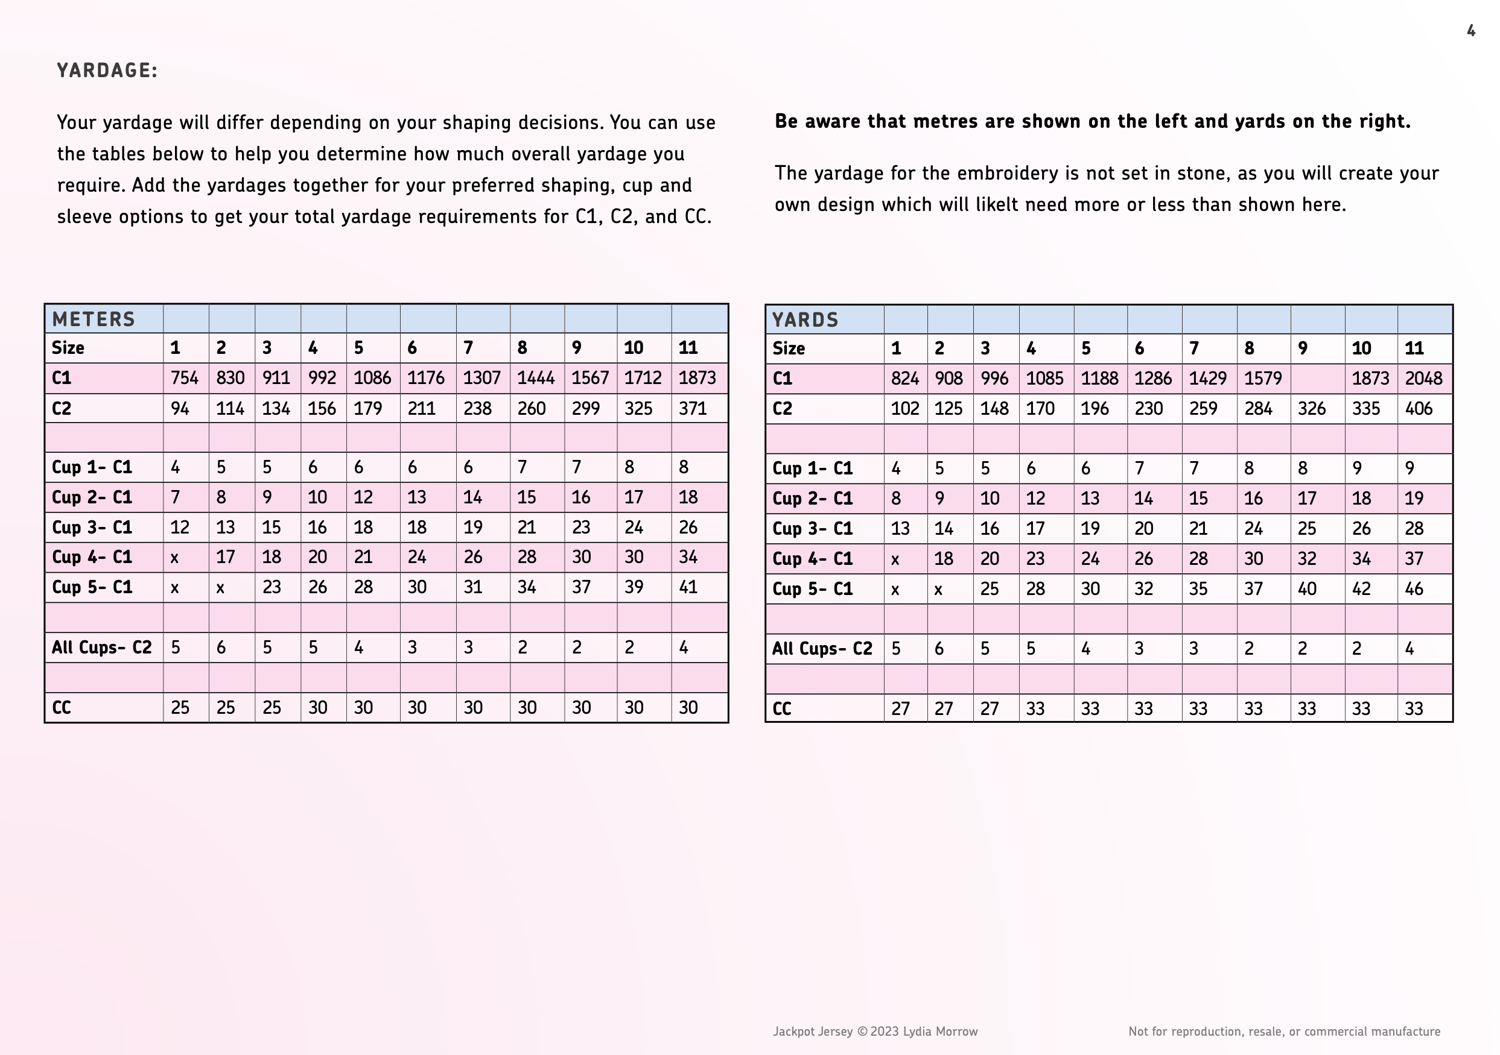
Yarn:
Indie Yarn Club ‘Happy Feet’ (100% superwash Merino, 365m / 399yds per 100g) in colourways ‘Lydia’s blue’ (C1), Undyed (C2), and ‘Red’ (CC).
Yardage is shown in chart form in pattern images.
Gauge:
28 sts and 40 rows/rounds per 10cm / 4in in stockinette stitch worked both flat and in the round using 2.75mm / US 2 needle.
I suggest knitting one flat gauge swatch at least 6in / 15cm square in your Main Needle, as well as one swatch in the round in your Sleeve Needle before knitting to check gauge. If there are more sts and/or rows than recommended in the Gauge, you should size up your needles. If there are fewer sts/rows, you should size down.
Stretch:
Further to your gauge, stretch percentage is important for this project, it should have around 170% stretch. Sometimes you may be able to get gauge with your swatch, but it won’t have very much stretch in it. To see if your swatch has enough stretch, mark 10cm / 4in on your swatch, hold it up to a ruler, and see if that area can stretch tightly to around 17cm / 6.7in. If it is able to stretch significantly more than that, you may wish to size down needles and see if you can still get gauge. If it stretches to less than 15cm / 6in you may wish to try sizing up needles and seeing if you can still get gauge. Superwash yarn in a negative ease pattern will stretch out with wear so the amount of stretch in the fabric you make will effect the final fit.
Supplies Needed:
- Tapestry needle
- 1 stitch marker (can be made from a loop of waste yarn.)
- 4 removable stitch markers
Needles:
- Ribbing Needle - 2.5mm / US 2 or size 0.5mm smaller than Main Needle in your preferred lengths for small circumferences worked in the round (I used 12in / 30cm)
- Main Needle - 3mm / US 2 1/2 or size needed to obtain gauge in your preferred lengths for small and large rows (I used 32in / 80cm)
- Optional Sleeve Needle- 3.25mm / US 3 or size needed to obtain gauge in your preferred lengths for small circumferences (I used in 9in / 23cm)
Most knitters seem to knit tighter for small circumferences like sleeves, so I suggest sizing up a needle size. If you are very confident you do not need to size up, you can continue using 3mm needles for your sleeves.
How to work out if you need optional short rows
If you don’t know if you need short row shaping, you can check by doing the following:
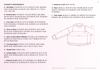
Using a piece of tape or some pins, mark along the top of your shoulder where the shoulder seam sits on your clothing, then tie a piece of elastic or yarn tightly to your waist at its narrowest point where the blouse will sit.
Have someone help you measure the distances between these 2 markers- once passing the tape from your shoulder over the fullest part of your bust, and once passing the tape straight down along the side of your bust, avoiding it altogether. If the distance over your full bust is longer, choose the Optional Bust Dart Cup that is closest to that difference.
SPECIAL THANKS
I’d like to say a special thanks to the team who helped me put this pattern together. It was important to me to make the best pattern possible and it would have never been possible without the help of these guys:
Jen Parroccini - Grading, and technical consultation
Heather Storta - Technical Editor
Dave Morrow - Graphic design
@boxdog.inc on instagram
Rose Dagul- Additional support and technical consultation
@rose_dagul on instagram